


A state-sponsored threat actor is targeting the Signal users in Germany in a complex phishing campaign
According to Germany's cybersecurity agency, targets include high-ranking politicians, the military, and investigative journalists
bsi.bund.de/SharedDocs/Cybersi…

reshared this
Lorenzo reshared this.


When Clever Hardware Hacks Bite Back: A Password Keeper Device Autopsy
Sometimes you have this project idea in your mind that seems so simple and straightforward, and which feels just so right that you have to roll with it. Then, years later you stumble across the sad remnants of the tearful saga and the dismal failure that it portrays. Do you put it away again, like an unpleasant memory, or write it up in an article, as a tearful confession of past sins? After some coaxing by a friend, [Alessandro] worked up the courage to detail how he set about making a hardware-only password keeper, and why it failed.
The idea was so simple: the device would pretend to be a keyboard and type the passwords for you. This is not that unusual, as hardware devices like the Mooltipass do something similar. Even better, it’d be constructed only out of parts lying around, including an ATtiny85 and an HD44780 display, with bit-banged USB connectivity.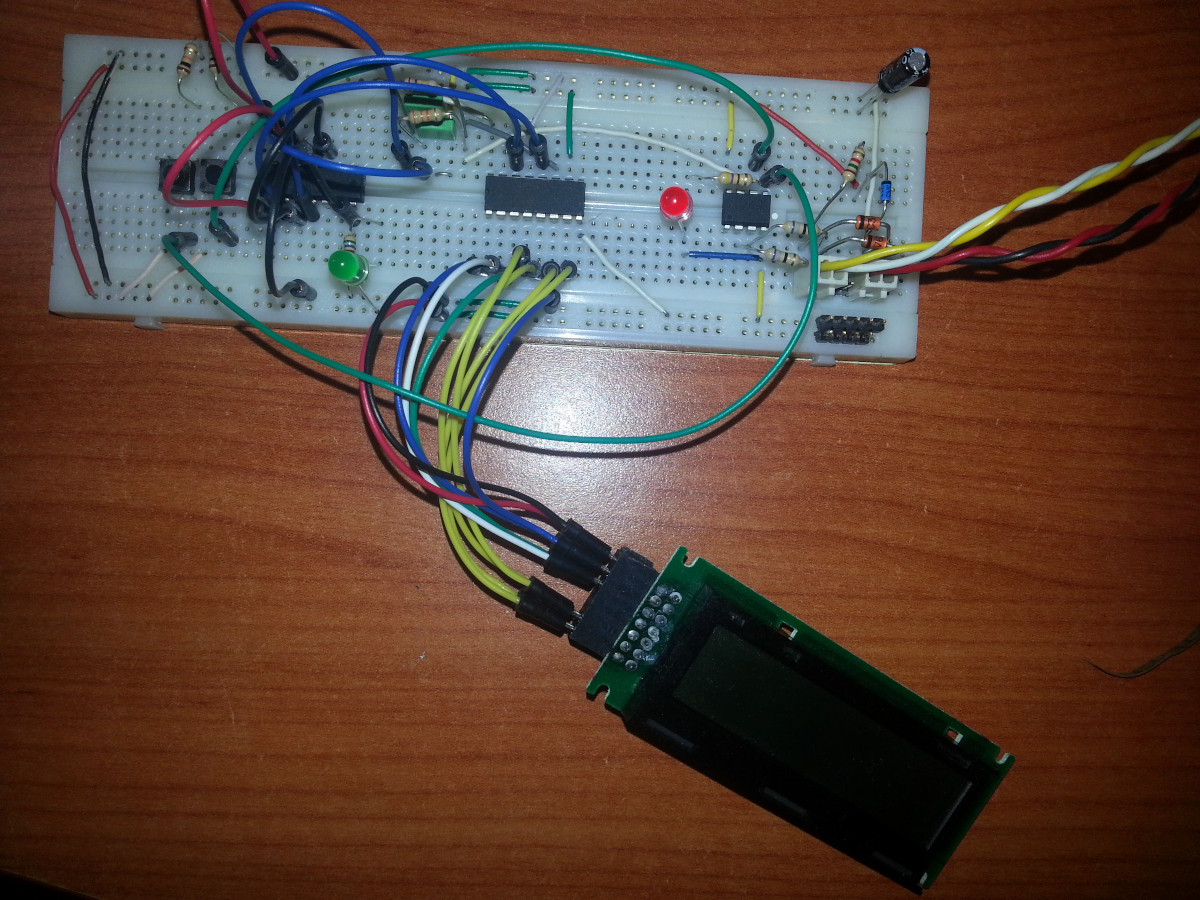
Overcoming the challenge of driving the LC display with one pin on the MCU required adding a 74HC595 demultiplexer and careful timing, which sort of worked when the stars aligned just right. Good enough, but what about adding new passwords?
This is where things quickly skidded off the tracks in the most slapstick way possible, as [Alessandro] solved the problem of USB keyboard HID devices being technically ‘output-only’, by abusing the indicator statuses for Caps Lock, Num Lock, and Scroll Lock. By driving these from the host PC in just the right way you can use them as a sort of serial protocol. This incidentally turned out to be the most reliable part of the project.
Where the project finally tripped and fell down the proverbial flight of stairs was when it came to making the bit-banged USB work reliably. As it turns out, USB is very unforgiving with its timing unlike PS/2, making for an infuriating user experience. After tossing the prototype hardware into a box, this is where the project gathered dust for the past years.
If you want to give it a try yourself, maybe using an MCU that has more GPIO and perhaps even a USB hardware peripheral like the STM32F103, ESP32-S3 or something fruit-flavored, you can take a gander at the project files in the GitHub repository.
We’re always happy to see projects that (ab)use the Lock status indicators, it’s always been one of our favorite keyboard hacks.

180 Shots on a Roll with the Little Stupid Camera
If you want to play with the coolest kids on the block when it comes to photography, you have to shoot film. Or so say the people who shoot film, anyway. It is very true though that the chemical medium has its own quirks and needs a bit of effort in a way digital cameras don’t, so it can be a lot of fun to play with.
It’s expensive though — film ain’t cheap, and if you don’t develop yourself there’s an extra load of cash. What if you could get more photos on a roll? It’s something [Japhy Riddle] took to extremes, creating a fifth-frame 35mm camera in which each shot is a fifth the size of the full frame.
Standard 35mm still film has a 24x36mm frame, in modern terms not far off the size of a full-size SD card. A standard roll of film gives you 36 exposures. There are half-frame cameras that split that frame vertically to give 72 exposures, but what he’s done is make a quarter-frame camera.
It’s a simple enough hack, electrical tape masking the frame except for a vertical strip in the middle, but perhaps the most interesting part is how he winds the film along by a quarter frame. 35mm cameras have a take-up reel, you wind the film out of the cartridge bit by bit into it with each shot, and then rewind the whole lot back into the cartridge at the end. He’s wound the film into the take-up reel and it winding it back a quarter frame at a time using the rewind handle, for which we are guessing he also needs a means to cock the shutter that doesn’t involve the frame advance lever.
We like the hack, though we would be worried about adhesive tape anywhere near the shutter blind on an SLR camera. It delivers glorious widescreen at the cost of a bit of resolution, but as an experimental camera it’s in the best tradition. This is one to hack into an unloved 1970s snapshot camera for the Shitty Camera Challenge!
youtube.com/embed/_SCyquRGmqk?…

A Failed SwitchBot Plug Mini and Cooking Electrolytics
Poorly designed PCBs and enclosures that slowly cook the electrolytic capacitors within are a common failure scenario in general, but they seem especially prevalent in so-called Internet-of-Things devices. The SwitchBot Plug Mini that [Denki Otaku] took a look at after many reports of them failing is one such example.")
These Mini Plugs are ‘smart’ plugs that fit into a regular outlet and then allow you to control them remotely, albeit not integrated into a wall or such like the Shelly 2.5 smart relay that also began dying in droves. Yet whereas with the Shelly relays this always seemed to take a few years to show up, generally in the form of WiFi connectivity issues, these SwitchBot plugs sometimes failed within weeks or start constantly switching the relay on and off.
After SwitchBot started an exchange program for these plugs, [Denki Otaku] decided to examine these failed devices from affected users. Inside a dead unit the secondary side’s 680 µF capacitor was clearly bulging and had cooked off its electrolyte as a teardown of a dead capacitor confirmed. After replacing this one capacitor a formerly unresponsive plug sprung back to life.
This failed capacitor is important as it serves as the buffer for the 3.3 V rail, which otherwise sags below the operational range of the microcontroller during power-hungry WiFi operations, causing it to reset. As for the question of why this failure happened, there are two possibilities: one involves the B- or C-tier capacitor – for which no datasheet could be found – being unsuitable for dealing with the ripple current it was exposed to, the other being the high temperatures in that section of the PCB.")
As a thermal image of the working PCB shows, the voltage regulator and switching circuitry present on the PCB – right below where the failed capacitor is located – reach a temperature of up to about 50°C, without taking into account the sealed enclosure that the PCB is located in.
The WiFi module that is located next to the capacitor and sticking up vertically from the PCB also reached a similar high temperature, making sure to bake the affected capacitor from below and the side. Even in open air the capacitor reached a temperature of about 43°C.
While a higher-quality capacitor will very likely cope with ripple current better, ultimately it’s pretty much just an unnecessarily stressful environment for electrolytic capacitors. While investigating two newer batches of these Plug Minis that are not subject to recall, the older unit still had the same flawed capacitor, while the new unit had replaced it with what looks like a polymer capacitor with the same ratings.
Interestingly, one of the failed plugs that [Denki Otaku] got sent did use one of these polymer capacitors, but appears to have another fault that wasn’t further investigated. Either way, the use of a polymer capacitor seems to help with the longevity to get it at least past the warranty period, but without a redesign these units seem doomed to fail due to rapid capacitor aging.
youtube.com/embed/YkI5GK734eI?…

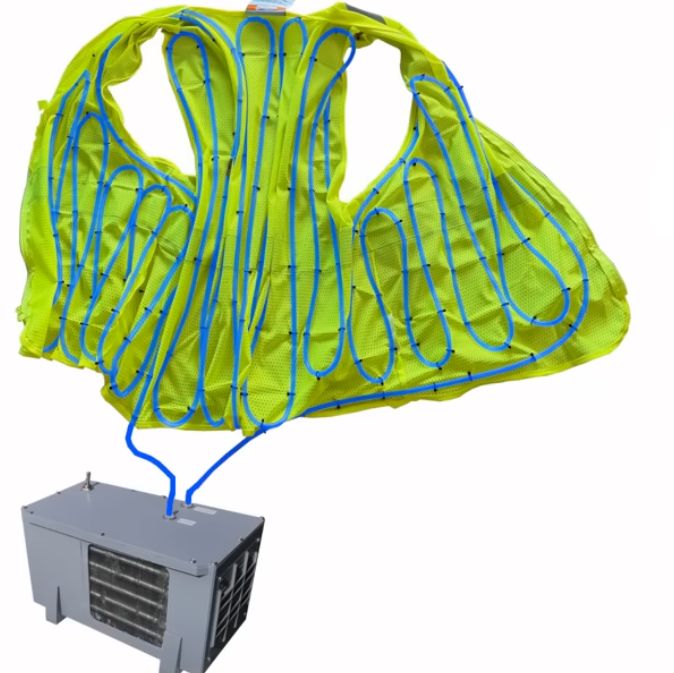
Making a DIY Refrigerated Vest With Battery and Solar Power
Keeping a cool head is difficult at the best of times, least of all when it’s summer and merely thinking of touching bare skin to the pavement already gets you a second-degree burn. Unfortunately, it’s not possible to spend all summer in an air-conditioned room, but what if you took said room with you? Introducing [Hyperspace Pirate]’s air-conditioned vest.
Following on from last time’s adventures with a battery-powered air-conditioner that merely blew cold air onto one’s overheating body, this time the same compressor is used for a more compact build.
Since obviously using your body as part of the condenser would be uncomfortable, instead a heat exchanger was used that transfers the delicious frosty cold to water-filled tubing, zip-tied inside a very fashionable vest.
The basic unit runs on a couple of LiPo packs, but a solar-powered circuit was also built and tested using two small-ish panels. Of course, the requisite backpack-sized setup for that configuration is somewhat bulky, but at least the panels can also provide shade in addition to power for the compressor, hitting two fiery birds with one frosty stone.
Compared to one of those solar-powered caps with a built-in fan, this unit with some refinement could actually be an improvement, as well as keeping you a lot chillier. We’re looking forward to [Hyperspace]’s trial runs in the upcoming Floridian summer, as well as future chilling adventures.
youtube.com/embed/qv0IJM3BV9Y?…

Robots Talking to Robots
Although there are a few robots on the market that can make life a bit easier, plenty of them have closed-source software or smartphone apps required for control that may phone home and send any amount of data from the user’s LAN back to some unknown server. Many people will block off Internet access for these types of devices, if they buy them at all, but that can restrict the abilities of the robots in some situations. [Max]’s robot vacuum has this problem, but he was able to keep it offline while retaining its functionality by using an interesting approach.
Home Assistant, a popular open source home automation system, has a few options for voice commands, and can also be set up to transmit voice commands as well. This robotic vacuum can accept voice commands in lieu of commands from its proprietary smartphone app, so to bypass this [Max] set up a system of automations in Home Assistant that would command the robot over voice. His software is called jacadi and is built in Go, which uses text-to-speech to command the vacuum using a USB speaker, keeping it usable while still offline.
Integrating a voice-controlled appliance like this robotic vacuum cleaner allows things like scheduled cleanings and other commands to be sent to the vacuum even when [Max] isn’t home. There are still a few limitations though, largely that communication is only one way to the vacuum and the Home Assistant server can’t know when it’s finished or exactly when to send new commands to the device. But it’s still an excellent way to keep something like this offline without having to rewrite its control software entirely.
Questo sito web utilizza cookie tecnici e di sessione. Proseguendo la navigazione su questo sito, accetti l'utilizzo dei cookie.
Dessalines
in reply to Arthur Besse • • •